Thre are lots of lovely new images on there from around the UK and further afield.

Snake and Ladder
(by Kevin Goodchild)
I was involved in the design of the site, so why not take a look and leave a comment below as to what you think about it.


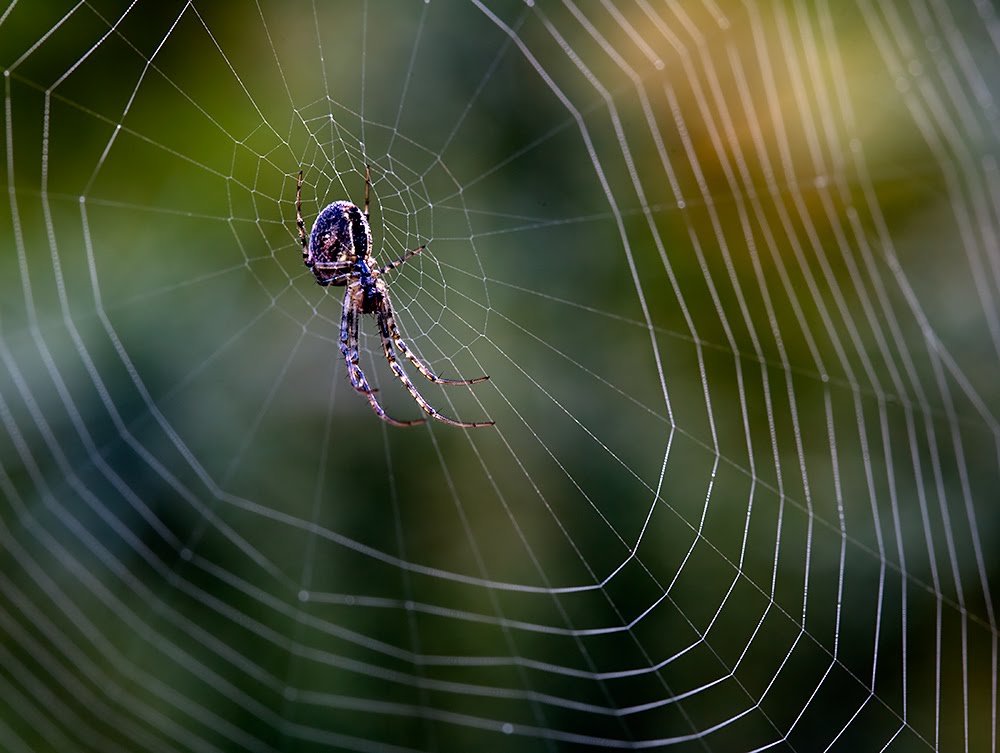 Safe in the Web
<input name="item_name" value="(iView:Headline) (iView:Item1Description)" type="hidden" >
 Gold Green and Blue
 Dark Cloud backup?
 In the Clouds

 Moonlight Fossett
3. Edit the transformer.xslt file:
near the top you will find a section that looks like this:
<!-- paypal Settings -->
<xsl:variable name="PayPalAccount">You@there.com</xsl:variable>
<xsl:variable name="ReturnScreen">www.test.com</xsl:variable>
<xsl:variable name="CancelScreen">www.test.com</xsl:variable>
<xsl:variable name="CurrencyCode">GBP</xsl:variable>
<xsl:variable name="CurrencySymbol">£</xsl:variable>
<!-- Individual Sale Items -->
<xsl:variable name="Item1Description">10"x20" Print</xsl:variable>
<xsl:variable name="Item1CodeNo">100</xsl:variable>
<xsl:variable name="Item1Price">150</xsl:variable>
<xsl:variable name="Item2Description">11"x22" Print</xsl:variable>
<xsl:variable name="Item2CodeNo">101</xsl:variable>
<xsl:variable name="Item2Price">155</xsl:variable>
<xsl:variable name="Item3Description">10"x20" Print framed</xsl:variable>
<xsl:variable name="Item3CodeNo">102</xsl:variable>
<xsl:variable name="Item3Price">150</xsl:variable>
<xsl:variable name="Item4Description">11"x22" Print framed</xsl:variable>
<xsl:variable name="Item4CodeNo">103</xsl:variable>
<xsl:variable name="Item4Price">155</xsl:variable>
You need to change the values between <> and <> on each line to reflect your settings.
The Settings:
| Setting | Current Value | Description |
|---|---|---|
| PayPalAccount | You@there.com | Your paypal account ID |
| ReturnScreen | www.test.com | URL to return to after a succesful purchase |
| CancelScreen | www.test.com | URL to return to after the user has pressed cancel |
| CurrencySymbol | £ | Currency symbol in HTML (£ = &pound;, $ = $ € = €) |
| CurrencyCode | GBP | Currency code (GBP = pounds, USD = dollars, etc ) |
| Item1Description | 10"x20" Print | Description of first item type you sell |
| Item1CodeNo | 100 | A code number for this item if you have one |
| Item1Price | 150 | Price for item 1 |
| Item2Description | 11"x22" Print | Description of second item type you sell |
| Item2CodeNo | 101 | A code number for this item if you have one |
| Item2Price | 155 | Price for item 2 |
| Item3Description | 10"x20" Print framed | Description of third item type you sell |
| Item3CodeNo | 102 | A code number for this item if you have one |
| Item3Price | 150 | Price for item 3 |
| Item4Description | 11"x22" Print framed | Description of fourth item type you sell |
| Item4CodeNo | 103 | A code number for this item if you have one |
| Item4Price | 155 | Price for item 4 |
Having made all the changes, save the file.
As I said it's not perfect yet but hopefully it will give those of you who wish to dabble, something to dabble with.
1. There ain't much documentation out there.
For a flagship product like Lightroom Adobe seem to have been particularly tardy in providing the documentation as to how to create your own web galleries. The entire total of what I have found is this:Check you have a Web Galleries folder (by default you don't) so you will need to create it:
Download the demo template from here: lightroom_wpg_example.zip
Unzip the file into the web galleries folder you just created.

3. Create your own web Gallery
Copy the example folder in Web Galleries and give it a new name.Now open the galleryMaker.xml file and edit the values in the <galleryInfo> section to describe your template (unless you change these values Lightroom won’t detect your new template):
Original version <galleryInfo>
<amg ver="0.5" />
<thumbnail path="preview.jpg" />
<galleryName>Demo Template</galleryName>
<galleryDescription></galleryDescription>
<gallerVersion ver="1.0" />
<livePreview enabled="yes" />
<creator company="Adobe Systems, Inc." designer="Adobe Lightroom Engineering" />
<category>Web photo gallery</category>
<identifier>com.adobe.wpg.demo1t</identifier>
<ag:galleryType>HTML</ag:galleryType>
<ag:maximumGallerySize>20</ag:maximumGallerySize>
</galleryInfo>My Version
  <galleryInfo>
<amg  ver="0.5" />
<thumbnail  path="preview.jpg" />
<galleryName>PayPal  Template</galleryName>
<galleryDescription></galleryDescription>
<gallerVersion  ver="1.0" />
<livePreview  enabled="yes" />
<creator  company="www.shepherdpics.com" />
<category>Web photo gallery</category>
<identifier>com.shepherdpics.wpg.paypal</identifier>
<ag:galleryType>HTML</ag:galleryType>
<ag:maximumGallerySize>20</ag:maximumGallerySize>
</galleryInfo>
Start Lightroom and you should now see your new template in the available list.
 Once again close Lightroom.Edit the GalleryMaker.xml file to Generate the output sizes you need.
For my templates I wanted both thumbnails & large images so I changed the <sizes> section from this:
<sizes>
<size  height="130" name="thumb" width="130" />
</sizes>
<sizes>
<size  height="130" name="thumb" width="130" />
<size  height="500" name="full" width="500" />
</sizes>
Though you might want loads of options - like this:
<sizes>
<size name="thumb" width="160" height="120"  />
<size name="small" width="640"  height="480" />
<size name="medium" width="880"  height="660" />
<size name="large" width="1024"  height="768" />
<size name="video" width="400"  height="300" fps="30">
</sizes>
Open Lightroom and Export the web gallery to a new directory. If you open this directory you should see contents similar to this:

In the main directory are the index.html and individual html documents for each image. The thumbnail images have been created in the images/thumb directory and the larger images are in images/full.
The transformer.xslt file is an XSLT template that you use to transform the XML in source.xml into XHTML files. If you didn't understand that last sentence you are in for quite a rough ride and it might be worth looking through some tutorials on XSLT now.
Some things I have learnt about the transformer.xslt file are:Next blog I will be posting my first go at integrating Paypal and Lightroom Web-Galleries. This will include example download files for you to use.
I hope this posting has been of use, please feel free to add a comment if this has helped you or if you have discovered anymore information.
<!-- iView HTML Engine Directives
   (iView:InMediaWidth 500)
   (iView:InMediaHeight 500)
   (iView:Variable name = "Gallery Title" default = "")
   (iView:Variable name = "PayPalAccount" default = "paypal@paypal.com")
   (iView:Variable name = "ReturnScreen" default = "http://www.yoursite.com/Success.html")
   (iView:Variable name = "CancelScreen" default = "http://www.yoursite.com/Galleries.html")
   (iView:Variable name = "CurrencySymbol" default = "£")
   (iView:Variable name = "CurrencyCode" default = "GBP")
   (iView:Variable name = "Item1Description" default = "18 x 12 inch Mounted print")
   (iView:Variable name = "Item1CodeNo" default = "")
   (iView:Variable name = "Item1Price" default = "75")
   (iView:Variable name = "Item2Description" default = "18 x 12 inch Framed & Mounted print")
   (iView:Variable name = "Item2CodeNo" default = "")
   (iView:Variable name = "Item2Price" default = "125")
   (iView:Variable name = "Item3Description" default = "24 x 18 Mounted print")
   (iView:Variable name = "Item3CodeNo" default = "")
   (iView:Variable name = "Item3Price" default = "250")
   (iView:Variable name = "Item4Description" default = "24 x 18 inch Framed & Mounted print")
   (iView:Variable name = "Item4CodeNo" default = "")
   (iView:Variable name = "Item4Price" default = "300")
-->

