Wednesday, 28 February 2007

Lemon ~ Limited Edition Management ONline

Many photographers who produce Limited Edition prints of their work have developed ad-hoc systems to manage them.

Faced with the constant headache of maintaining what has been printed and sold, which numbers have been allocated, etc. I decided to develop a system to bring this under control. The current release features:

  • Keep track of editions and sales easily from one screen.
  • Block Allocate ~ reserve a group of prints for a particular customer.
  • Certificates of Authenticity.
  • Print Run ~ Mark a group of prints as printed and generate the appropriate certificates.
  • Sales reports.
  • AutoAllocate© ~ When creating an edition numbers can be automatically allocated.

This is free software. The only thing I ask is that you mail me if you use it. The reason for this is so that I can mail out notices of any bug fixes/enhancements to existing users as soon as they are spotted. I like to keep track of the number of users out there. It's not much to ask is it?

New Release - Version 1.1 Released 23 Oct 2006

  • First Release used in anger :)
  • Added ability to generate single certificate
    Added Image path rename form
    Added version History
    Added new certificate Format "Shepherdpics"
  • Recreated the reports to provide useful info!
    Various minor fixes

Where can I get this fantastic software ?

download Click here to download


Access97 Version

How do I install it ?

The Installation is very straight forward. Here are the instructions.

Where can I get support ?

Check out the users guide, if that doesn't help then simply mail me and I will see if I can help.

Does it cost anything ?

Nope not a sausage. If you would like to donate a thankyou gift then please use the paypal button below and I will make sure all payments go to charity.

Tuesday, 27 February 2007

Photoshop Sharpening Actions

Sandra Myers has supplied some actions to help with sharpening of digital images in Photoshop.

As Sandra was kind enough to make them available to people for free - we have been kind enough to host them here for here.

Description

The sharpeners file contains 2 actions (do not try to open it - it will just open up your photoshop program)

1. Traditional sharpener works by first blurring a layer and then sharpening a layer. With this sharpener you control which edges you want to sharpen by tweaking the levels. (Until you get the idea of how it works just “OK” and “continue” your way through until you get to the unsharp mask bit at the end and use the slider to set the sharpening to your taste.

2. The High Pass sharpener works by the High Pass method described in many books and guidance instructions are given during the action.

Instructions

How to Install

The files go in the "photoshop actions" folder which is inside the "presets" folder in the photoshop program folders

To Do This

Download the file from hereDownloadto somewhere handy like the desktop. Then copy and paste it into the photoshop actions folder.

The route to this should be something like this depending on your version of photoshop :----

  1. My Computer – Local Disk C (usually) – program files – Adobe – photoshop cs (or whatever version) – presets – photoshop actions

When you have pasted it into the actions folder close everything up again and then open photoshop.
Go to the arrow icon at the top right hand corner of the actions palette and when the drop down menu appears choose "Load action" Highlight the Sharpeners action and load it

Open an image – highlight your choice of sharpener and press play

For those of you with Photoshop Elements - How to Run Actions in Adobe Photoshop Elements 3, 2 and 1

Digital Velvia Photoshop Actions

A while back there was a discussion on Ephotozine about reproducing the effect of Fuji Velvia film in Photoshop.

Terence Irons came up with a very detailed description of how to produce the effect, I have since made them into a set of Photoshop actions which work rather well.

I have now made them available here for download.

Description

The actions are based on layers so they are not distructive to your images and can be easily undone. The velvia file contains 7 actions, which are in three groups that should be run in this order:

1. Cleanup - removes noise from the image. Use if you don't have neatimage or Noise Ninja.

2. Contrast - comes in 3 varieties (Normal,Medium & Strong)

3. Colour Boost comes in 3 varieties (Normal,Medium & Strong) .

Instructions

How to Install

The files go in the "photoshop actions" folder which is inside the "presets" folder in the photoshop program folders

To Do This

Download the file from hereDownloadto somewhere handy like the desktop. Then copy and paste it into the photoshop actions folder.

The route to this should be something like this depending on your version of photoshop :----

  1. My Computer – Local Disk C (usually) – program files – Adobe – photoshop cs (or whatever version) – presets – photoshop actions

When you have pasted it into the actions folder close everything up again and then open photoshop.
Go to the arrow icon at the top right hand corner of the actions palette and when the drop down menu appears choose "Load action" Highlight the Velvia action and load it.

For those of you with Photoshop Elements - How to Run Actions in Adobe Photoshop Elements 3, 2 and 1

Tonight I'm going to talk to you about Deja vue

I have noticed that the Articles section on this site has become a bit orphaned by this here blog thingy. It is also quite noticeable that the blog entries come up on web searches much more than entries in the articles section do.

So I have decided to move the articles one by one into the blog. Whilst I am doing it I will try to update the contents too.

Regular readers may experience the occasional touch of deja-vue for which I apologise. Normal service will be resumed soon.

For no particular reason at all here is a picture taken at The Naze one morning.

Naze Dawn
(Click to view large)

Monday, 26 February 2007

Puddle Paradise

Continuing on with The Friday Lunchtime Project, I popped over to The South Bank and The London Eye last Friday.

Now, the London Eye is one of the most photographed locations in London. So it's almost impossible to find a new view of it. When faced with something that is photographed so frequently I like to adopt Liddell heart's doctrine of the indirect approach*.

As it was raining it was raining I decided to utilise the many puddles and get a reflection of the wheel in it.
Click to view large

Whilst it looks like I have run half a dozen Photoshop filters on this, it is in fact virtually straight out of Capture 1. I simply increased the contrast and reduced the saturation and it resulted in this rather fun noisy monochrome effect.

*Bet you weren't expecting a reference to 20th century armoured warfare strategy!

Saturday, 24 February 2007

Photographer Interviews

This week has featured 2 rather interesting interviews with pro photographers appearing on-line.

The first is a video interview of Henri Cartier-Bresson talking to Charlie Rose which is certainly something I have never seen before.

The second is a lovely in depth piece about Hellen Van Meene by David Toyne.

What strikes me about both artists work is that if they were posted anonymously on the on-line photography sites like Flickr or ephotozine they would not get much attention at all. Proof if it were needed that the great photographers develop their own individual style rather than attempt to pander to popular opinion of what is "right" or follows "the rules".

Thursday, 22 February 2007

How to use Controlled Vocabulary in Adobe Lightroom (Part 2)

Click any image to view larger

Strangely (for me) this is the fourth consecutive blog on the same subject, normal service will soon be resumed and I will go off at a tangent soon This keywording thing has a lot going on, and the joys of Lightroom are still a bit of an enigma but its an interesting adventure.

Having loaded The Controlled Vocabulary Catalogue in to Lightroom, you may find that things seem to slow down quite a lot. Well I say a lot, but really we are talking response times that are measured by the time-scales usually reserved for geologists. Hopefully the clever people at Adobe can fix the problems in the next version or service pack.

Until The Lightroom team can fix the problem it may be more usable to delete blocks of keywords that you don't use to reduce the load on the system.

To use the keyword hierarchy you can enter keywords in the "keyword Tags" panel:


As you type in keywords, separated by commas the system prompts you with keywords that are available in the list. Once you have entered a few base keywords then pressing enter will cause a bit of a wait if you have a large keyword list. Actually unless you are running Lightroom on a Cray super-computer now would be a good time to put the kettle on.

Eventually all of the parent categories in the vocabulary will appear in the implied keywords box, this is the real power of using a Controlled Vocabulary, simple keywords generate a lot of information.


Finding by Keywords

To search the Keywords you have entered, you can use the the Keywords tag tree on the left. To search for a particular tag, open the find panel on the left or select Library>Find (ctrl+F) on the menu. Select Keywords from the dropdown and enter the tag you are searching for.


As you type your library is instantly filtered:


If Adobe can deal with the performance issues then I think using CV with Lightroom will be a seriously useful combination.


Related Posts
Controlled Vocabulary for Adobe Lightroom 1.1 released!

Controlled Vocabulary and Adobe Lightroom 1.1
How to use Controlled Vocabulary in Adobe Lightroom (part 1)

Wednesday, 21 February 2007

How to use Controlled Vocabulary in Adobe Lightroom (part 1)

Click any image to view larger

Now that I am tryling Lightroom and I thought I would try out if it is possible using a controlled vocabulary when keywording images. David Riecks at www.controlledvocabulary.com has produced a controlled vocabulary keyword catalogue, which is a great basis for a structured keywording of files.

It turns out its not to difficult to get the Control Vocabulary file into Lightroom, all it requires a simple bit of Excel work to convert it. This is what you do:

1. Order the Controlled Vocabulary Keyword Catalogue.
2. Have Excel installed on your PC
3.Open Excel
4. Select File>Open. Change the file type to text and select the CV text file:

5.The text import wizard appears. Select Delimited:

6.Click Next and make sure only "tab" is checked:


7. Click Next and Finish.
8. The CV file is now loaded in Excel.
9. Select File>Save As and give the file a new name - make sure the file type is set to Text - Tab Delimited.
10. A warning message may appear:


click Yes.
11.Start Lightroom.
12.In the Library module, select Metadata>import Keywords and select the file you have just created.
13.Lightroom will grind to a hault for a few minutes but eventually the CV keywords will appear in the Keyword Panel


Within Lightroom selecting a keyword will cause keywords higher up the hierarchy to be allocated as implied keywords.

Be warned that keywording does seem to slow down a lot when using this number of keywords - lets hope Adobe manage to sort out the performance issues.

Update 22 Feb 2007
People have asked why import a file in a tab separated format only to immediately output it in the same format...which is a fair question. The reason is that CV file currently available seems to have an end of line character that Lightroom does not recognise and this process removes it.

David Riecks tells me that the next version of the Controlled Vocabulary Catalogue should not have the problem with the end of line characters in which case you should be able to start from step 11.

I have had a lot of people tell me that this is causing them performance issues in Lightroom, I have yet to do a thorough investigation but it seems that every time you access a keyword Lightroom is calculating on the fly how many images in your catalogue are using it.

Controlled Vocabulary in Adobe Lightroom (part 2)


Update 26 March 2007
It seems my experience with the number of keywords severely impacting performance
is not unusual - Anne Gall has created a thread in the Adobe forum covering the problems in quite some detail.l


Related Posts
Controlled Vocabulary for Adobe Lightroom 1.1 released!

Controlled Vocabulary and Adobe Lightroom 1.1
How to use Controlled Vocabulary in Adobe Lightroom (part 2)

Using Controlled Vocabulary with Iview Media Pro

A while back I became interested in using a controlled vocabulary when keywording images. David Riecks at www.controlledvocabulary.com has produced a controlled vocabulary keyword catalogue, which is a great basis for a structured keywording of files.

The only problem with the system was that it didn't work with iView Media Pro, but a bit of research and some excel coding and I came up with a way to do it. If you would like to do it yourself then you need to:

1. Order the Controlled Vocabulary Keyword Catalogue.
2. Have Excel installed on your PC
3. Download this Excel file.

I am hugely grateful to David Riecks for writing the following user guide to the using the Excel File:


When you first open the ProcessCV file it appears to be deceptively
simple. There are two fields

The first labelled the "Controlled Vocabulary filename" is the path to
the location where you stored the text version of the CVKC (or
another file using the same format and saved as a tab delimited text file).

In the Target Keywords File Name: use something like the following.

C:\Documents and Settings\[username like your name or
Administrator]\Application Data\iView\Plug-ins\Vocabulary\Default\keywords.txt

When you click on the "Create Keywords file" one of three things will
happen. Either it will start processing your file, or you will get
one of two warnings.

If you get one that says "Run Time error 1004" this means that the
source file you indicated in the first field is incorrect. The other
indicates that the ability to run Macros is disabled. It will look
like the following:

-----
Macros in this workbook are disabled because the security level is
high, and the macros have not been digitally signed or verified as
safe. To run the macros, you can either have them signed or change
your security level. Click Help for more information.

OK or Help
-----

In order to enable these in Excel go to:

Tools >> Options >> Security tab, and look for the "Macro Security"
button in the lower right.

In the subsequent dialog, change the radio button from "High" to
"Medium" which states, "Medium, You can choose whether or not to run
potentially unsafe macros."

Click OK in the "Security" dialog, and then OK in the "Options" dialog.

You will need to close the file and reopen it (or perhaps even restart Excel).

When you reopen the ProcessCV.xls file, you'll probably see something like:

---
"A file named "c:\Documents and Settings\[username]\My
Documents\[foldername]\ProcessCV.xls contains macros.

Macros may contain viruses. It is always safe to disable macros, but
if the macros are legitimate, you might lose some functionality.

Disable Macros Enable Macros More Info"
--

Click on the "Enable Macros" button and insure that you have set the
location of the source and destination files in the ProcessCV file.
Then click on the "Create Keywords file" and you'll see in the lower
left corner information about "processing row XX of XX" as the macro
does it's work.

At the end you may also receive a warning like:

"A file named "c:\Documents and Settings\Adminstrator\Application
Data\iView\Plug-ins\Vocabulary\Default\keywords.txt already exists in
this location. Do you want to replace it?
Yes No Cancel"

If you wish you can copy the file, before you run the ProcessCV.xls file.

If there is no Keywords.txt file then the process will simply stop
when completed.

Start iView, then choose Edit >> Preferences >> Vocabulary Editor

Make sure that "Default" is chosen in the Vocabulary pull down, and
that the "keywords" field is selected in the "Field" pull down.

Then check, OK

If you start typing a particular word, such as "dog" into the
Keywords field in the Info Panel, then you can click on the downward
pointing arrow and see all the strings which contain that word, and
you can pick the most appropriate line. Since it's a comma-separated
string when you press the return/enter key, each term in the line is
entered as a separate keyword.

In the example above you might get "animals, pets, dog, puppy" or
"animals, wildlife, mammals, canine, dog" depending on where you
intend to place the images.

If you just click the downward pointing arrow and don't enter a word
in the keyword field the drop-down list will be very long. All of the
terms, however, are organized hierarchically so it's not that
difficult to find what you want with scrolling. Once you are familiar
with the list, entering a high level category word narrows down the
set considerably.


David has stated that future versions of the Keyword Catalogue will come with the iView format supplied. So hopefully things will be even simpler in the future.

Update 5 April 2007
Version 3 of The Controlled Vocabulary Keyword Catalogue has just been release. As promised this provides native support for iView Media Pro, installation instructions can be found here.

Tuesday, 20 February 2007

Lightroom and Keywording

Its not uncommon for people to believe only pro photographers who sell to image libraries really need the keywording and organisation facilities of products like Lightroom and Iview Media Pro.

Well since reading "The DAM Book" by Peter Krogh I have come to realise that keywording is not just for pros. It can give real benefits to anyone who has a lot of images to manage.

As part of my current workflow I have Downloader Pro set up so that every time I download from a card it prompts me for keywords. I usually enter the location and the event only, all the shots downloaded from that card are then tagged with that information (also known as metadata).

When I move the shots to my archive system I just add extra tags for any people in a particular shot. I also rate mark shots for later use in my web galleries with a star rating. The keywording of A single months worth of shots takes about 10 minutes using iview media pro.

This makes image retrieval significantly easier, as generally I am looking for a person or a place. The advantage over a structured file system is that you can have multiple keywords whereas the file can only be in one place.

Files are actually stored by date and type in a Year/Month/Day/Type directory structure where type is either raw,tiff or webready.

My initial thoughts about Adobe Lightroom is that it may actually remove the need to store different versions of the same file due to its sophisticated print options & stacks, more playing may confirm this. The Keywording facilities of Lightroom seem reasonably comprehensive so far..which is nice.

The image download system on Lightroom is highly configurable and (almost) meets my needs and could possibly make Downloader Pro redundant.

I am not completely happy with the workflow Lightroom seems to want me to work with though. It seems to be based around a single library and I prefer my current setup of a "working" and an "archive" library. Though it is early days yet so maybe I will find a way to implement this structure within Lightroom.

Monday, 19 February 2007

Adobe Lightroom is Live


Adobe Lightroom has just been released (I refuse to add "Photoshop" in the title as its just plain confusing). Version 1.0 is now available as a 30 day trial download.

Lightroom promises a great simplification of the digital photographers workflow. I intend to download the trial and give it a try out. I wasn't too happy with the beta releases but I intend to look at the entire thing afresh and take the time to work through some tutorials too.

I will let you know how I get on and what I learn. Why not try it out yourself and let me know how you get on, I would love to hear from you.

Friday, 16 February 2007

Its time to split up the herd!

Regular readers will know of my shiny new pair of buffalo, that are the basis of my new image backup solution. They are set up so that one backs the other up every night.

It struck me that having them next to each other was probably not a good idea as fire, theft and other disasters are likely to wipe out both in one go, thus completely negating the point of the backups.

So I decide to move the backup drive as far as possible away from the main drive. Now I could have run Cat5 cabling across the house and down a floor but that would involve a lot of disruption and even (heaven forbid) ..decorating!

I decided to take advantage of my wireless network and use that to connect up the second Linkstation to the network. I got hold of a Belkin 802.11g Wireless Client Bridge


All I had to do switch it on, and tell my wireless network about it, then it was up and running perfectly. I plugged the second Linkstation in to it and I now have a backup which is reasonably remote from the main system.

Having sorted out data and backups I found I had 2 external USB drives that weren't being used any more. This is where the Buffalo solution comes in handy again as I have plugged one of these drives in to the second Linkstation, to provide another remote backup drive for email & documents.

Unfortunately connecting a USB drive to the Linkstation requires you to reformat it otherwise the Linkstation can't share it out. But once I had, I set it up as a backup target for my documents and emails using a simple xcopy batchfile.

In addition I have used Norton Ghost V10 to take an image of the boot disk of each PC which should make recovery of those PCs much simpler.

As for the last drive I have dumped all my images down to it (they just about fit into 250GB at the moment) and I will store this round my parents house to give me a remote backup.

Finally I am happy that I have a full backup solution...hurrah!

Thursday, 15 February 2007

In Search of a Title

This is another shot I took last Thursday, but I am not really happy with the title at all, so if you would like to suggest a different one, then please do. I'm at a loss for anything better.

Why not use the comments option at the bottom of this post to suggest something better? You know you want to.


Snow and Gate (unless you have a better suggestion)
(Click to view large)

P.S. By the way all the snow shots I have shown so far were taken within about 50 yards of each other.

P.P.S. Did I mention I think snow is brilliant.

Wednesday, 14 February 2007

If you do nothing else - make sure you have a backup!

Psst...wanna buy a hard-disk?

I'm coming to the conclusion that it should be illegal to sell computers and hard disks without also supplying some sort of backup device. We don't allow cars without seat-belts, yet we are happy to send people cruising down the information superhighway without even a virtual air-bag for protection.


If you can see this, you've lost your data!

If you are reading this then you almost certainly have something that needs backing up: Photos,documents,address lists,email.

Even if you only use email and the web,you still need a back up. Imagine yourselves in the shoes of some friends of mine, two days before their holiday their PC crashed, taking with it all the Ryan Air booking information that was in their email folder. Luckily we recovered it in time for the holiday, but it was a lot of stress they could have done without.

If something is of any importance to you, than you MUST have a backup. You can be lucky for a while, but one day your luck will run out and then you will really wish you had a backup.

There are so many ways to lose your data, and they fall into three groups: hardware failure, software failure and user error.

Hardware failure

A hard disk drive is a series of platters spinning at 100s of miles an hour with heads that "fly" just above the disk Which makes them really rather fragile indeed.

All drives have a MBF rating, which stands for "meantime between failure" (100000 hours would be a reasonable MBF). Did you get that? Meantime between Failure - so they are expecting the drives to fail, they just don't know exactly when! Also it's an average, it could fail tomorrow or never ever fail in its working life time.

It is actually guaranteed to fail just before you were about to do a backup.

Hard disk heads


Software failure

All computer programs have bugs (mine have more than most) and it could just be one of those bugs that destroys your valuable data. On top of this the interweb has far far too many spotty teenage boys who can't get themselves a girlfriend writing viruses and spyware targeted at your machine and precious documents.

Don't let these low-life's have the satisfaction of destroying your data, make sure your machine is secure and backed up.


User error

How many times have you accidentally deleted something? It's oh so easy enough to make a cock-up and delete stuff. Maybe you could undo your mistakes, but what if you didn't notice for a few weeks? Then it's bye bye precious data.

Alternatively, you could knock the drive of your desk, spill water on it or even some thieving swine will break in and steal your PC. Failing that there is always fire, flood, storm,earthquake,Yeti attack, etc, etc.


The Bottom Line

Bottom line is that I have had to explain to people too many times that all their data is gone - trust me its not a nice thing to tell someone.

If it is important to you then BACK IT UP

Photos illustrating this article are of the important bits of one of the five crashed hard disks I helped people with last year.

Now you know the "why" visit this posting for a the "How".

Tuesday, 13 February 2007

Ain't Snow Brilliant.

I love snow me.

It never ceases to amaze me, the capacity that some people chose to be grumpy about such a wonderful thing as snow. I can understand it if you live somewhere where it snows for months on end but, if we are really lucky, we get around one snow fall per winter where I live. Yet still you hear people who moan that the transport isn't working or that "it looks all right now, but it will look horrible when it goes all slushy".

These people simply have no soul; a big dump of snow transforms the ordinary and mundane sogginess of winter into a magical and fresh vista. Just for a few special hours, everything is transformed into an amazing beauty.


Green Lane (Roding Valley Meadows)
(Click to view large)


Last Thursday was a fantastic day, as I went to bed the forecasters had already predicted a lot of snow over night. I had already packed my rucksack and checked that everything was ready to go.

6:00am I was woken by one of my dogs who, it seems, was just as keen to get out and see the snow as I was. The first sight that greeted me when I looked out the windows was about four inches of snow on the window sill..... BRILLIANT!

20 Minutes later I was out the front door and heading for the local nature reserve, Roding Valley Meadows. I love this place; I continually find inspiration in its ever-changing moods, but Thursday surpassed all expectations.

As I crossed over the bridge, I could see that I was the first person to walk into the reserve since the snow had fallen. Perfect!

I did my best to capture the stillness and beauty the snow had created.


Stick in Snow
(Click to view large)

The sun didn't actually come up that morning, the white sky just got progressively brighter. So I didn’t need any filters to compensate for a sky that was just as white as the ground.

The first person I met on the reserve was an elderly chap who said to me "As soon as I saw it had snowed I had to get out here and enjoy it". I hope that I am doing the same thing when I am his age, that is if global warming hasn't put an end to snowfall in Southern England!

Later the dogs got their chance to play in the snow:


Spaniels in Snow (one for the family album)
(Click to view large)

Oh, Did I mention that I think Snow is brilliant!

Monday, 12 February 2007

Different photographers different results

If you exhibit your photographic work in public there are a few comments/questions you get asked more than any others:

1. "What camera do you have?" or "You must have a really good camera."
2. "Is this manipulated?" or more specifically "Did you do something to this in photoshop?"
3. "Did you use filters on this?"

In the modern world of digital technology, question 3 has given way to question 2. I intend to talk about this question in a later blog so I won't go into it just now.

The first one really annoys some photographers, as its a bit like saying to a chef "That was a fantastic meal, What pans do you use?". Me I'm happy to answer it, as it really is a backhanded complement, because the person can't imagine they will ever get results like that with their own camera and you must have some special magic.

One of the best examples of why it is quite a silly question, has just been posted by David Toyne in his article In The Eye of the Beholder? Here he shows what happens when a group of photographers are all given the same scene to shoot. The difference in the images is stunning and goes a long way to prove that the most important it of equipment a photographer has is his/her own unique view of the world.

This was driven home to me after looking at the images from fellow photographers taken at Happisburgh one morning. Most other photographers produced beautiful interpretaions of the entire scene in front of them.

Me I just liked this piece of the shattered sea defences:


Forgotten Guardian
(Click to view large)

Friday, 9 February 2007

Building A Club Website

A common question I see asked on websites is something along the lines of "I've been asked to create a website for my club/organisation, where do I start?".

Often things like Dreamweaver, Frontpage and Notepad are suggested. These are combined with guides on CSS & HTML plus descriptions of how to upload changes to the site. Not forgetting hosting solutions, domain names, etc, etc.

That's a lot of stuff to learn if all you want to create is a fairly standard website and have no intention of becoming a web guru, but there is another way...

If you want to drive a car you don't need to learn how the internal combustion engine works, you just worry about how the mechanisms of driving.

If you want to create a blog you don't need to write your own blogging system, you simply sign up to Blogger.com and create a blog. No need to worry about the mechanisms involved, just worry about what you want to say in your blog!

You can do the same thing with an entire site, all you need to do is worry about what content you want on the site, all you need is a Content Management System (CMS).

A CMS removes the worry of how you create the site and leaves you to think about what you want on the site. A club calendar can be added with just a few clicks. the same goes for forums, articles, photo galleries, classified adverts and a whole host of other content.

Recently I was asked to help a friend with updating the website of The Lusitano Breed Society and it quickly became obvious that the existing site needed a complete redesign and an awful lot more functionality. We decided to use a CMS as the administrator of the site was more interested in getting the site running then learning to be a web site developer.

The first problem was which CMS to use - there are an awful lot out there. We looked at a few CMSs and tried out the demo sites of each before settling on Joomla. We then signed up to a hosting provider who pre-installs joomla as part of the package.

All we needed to do now was to worry about the look of the site, its possible to buy or download templates to provide the look you want, but in this case I simply took the standard template and hacked it about a bit.

All in all, I think, a more preferable and maintainable option than coding the whole thing from scratch.

If you need to create a complex site it is always worth taking the time to investigate the CMS option. It could save you a lot of hassle in the long run and will provide you with a flexible paltform to meet your future needs.

Wednesday, 7 February 2007

How to create an "Actual Size" image in Photoshop

Occasionally its required to create a 1:1 sized image i.e. its the same size printed as it is in real life.

This is fairly easy to do in Photoshop by utilising the power of the crop tool. For example if we take this picture of a diskhead the length of the dashed area in real life is 2cm, we want it to still be 2cm when printed at 300ppi.

The Area marked with a dotted line should be 2cm wide
(Click to view large)

The first thing to do is to unlock the background layer so that it becomes a normal layer. Then take the crop tool and select the hide option on the toolbar. Now crop the image to just show the piece we have an exact measurement for.

The completed crop in Photoshop
(Click to view large)

Now we resize our file based on the size of this image. Go to Image>Image Size and enter the size this part of the picture should be.


Image Size Dialogue
(Click to view large)

Now all we need to do is select Image>Reveal All and our image is life size.

"Jobsworths" and "not-so-jobsworths"

Hardly a week goes buy on the photography forums without someone telling the story of being prevented taking pictures by some security guard jobsworth type. It seems that you are usually OK if you use the camera hand held but set up your tripod and its like a red rag to a bull for the average security guard.

Prime spots in London to meet this sort of thing are Canary Wharf and the London Eye, the later I find particularly amusing as they did once run a London Eye photography competition, but to add that extra element of challenge they still had their security guards stopping you using a tripod.

I once experienced it myself at the Lloyds building, I was trying to take a picture of some feet walking down the steps similar to my Treads photograph. I was composing the shot, waiting for the right moment, when I was tapped on the shoulder by a security guard and the conversation went like this:

Guard: "Do you have permission to be doing that ?"
Me: "No, do I need it?"
Guard: "Well I would rather you stopped"
me: "Why?"
Guard: "Well its not very nice to take pictures of peoples feet without their permission"

At that point I decided to leave, heaven knows what nefarious activities he thought I would get up to with a load of telephoto feet shots!

At other times people can be so obliging it is hard to believe. on Friday I was down at Limehouse Basin and a chap who owned a boat in the middle of the dock wandered up and asked me if I wanted to get on to the jetty, as I could "get some good shots from there". He was happy to let me in through the security gates even though he had never met me before.

A few years back I was standing on a jetty at Coniston Sailing Club setting up to take this picture:

Looking North
(Click to view large)

Now I knew had walked through a gate marked private to take the shot, so I was a little bit nervous when one of the club members approached me. I shouldn't have worried though as it turns out he was an ex-professional photographer and we proceeded to chat for about an hour or so as the sun went down. At the end of the conversation his parting words were "by the way, I suppose you know your trespassing?". To which I could only reply "err yes", then he left with a smile and a wave.

The latest incident happened on Saturday evening as I was standing waiting for the light to be right on this shot:

Light after Death
(Click to view large)


I have been waiting for a while, when a bloke comes out of the house nearest the field and starts walking the 100 or so yards towards me. Figuring I'm about to chucked off what is private land, I fire off a few shots and then await the inevitable confrontation:

Him: "Do you have permission to be here?"
Me: "Err no, I didn't know who owned the field"
Him: "Well if anyone asks, I said it's OK"
Me: "Thanks"

With that he wanders back to his house....and in case you are wondering, no one asked!

Tuesday, 6 February 2007

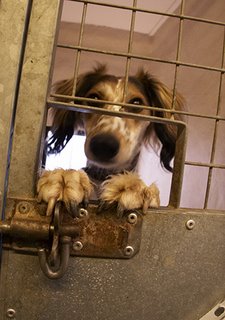
A spot of charity work

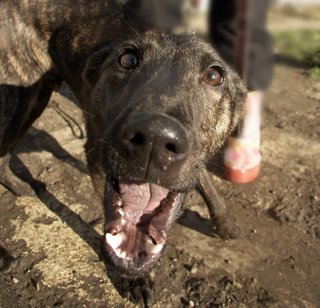
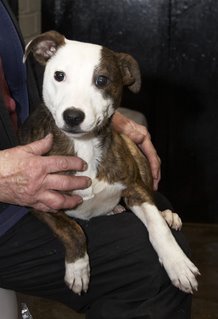
Every now and then I pop down to the local RSPCA kennels to take some shots of the dogs that have been awaiting re-homing for more than a few months. These shots are used on websites and posters by the local RSPCA.


Now this is not the easiest gig in the world. There are few choices of where to take the shots. Inside their kennels is way too dark, so the only choices are in the paddock where the dogs are exercised or out in the corridor between the kennels.

From a photographic point of view, the natural light of the paddock is better but it has huge problems. The dogs are locked up for a lot of the day so any chance they get to run around has them bouncing around like mad things. Add to this the fact that kneeling down isn't an option as there is an awful lot of doggy-doings about and you have a recipe for an interesting challenge.
It really is like motor sports photography as I try to track the dog bouncing off the walls.

A shot zoom (17-85 EFS) motor drive and shooting raw are my preferred options to ensure I actually get a usable shot. Raw helps with the fast changing exposure as most dogs seem to come in black or white, which makes not burning out the highlights quite tricky when the sun suddenly comes out.


Some of the puppies who were born in kennels are not yet confident enough to go outside, so there is no choice but to take the shots indoors in the corridor. For this I used a 580EX flash bounced off the ceiling to provide a reasonably natural light.


Not the sort of thing I normally shoot but a very interesting challenge none the less.

Monday, 5 February 2007

Simulating Film

There are still a few folk around who are old enough to remember film, and many of them miss the characteristics of their favourite film stock.

Petteri Sulonen has a good blog showing how to create different film types using curves and has the curves available for download too. Worth playing with if you have a few moments.

If you are missing the saturation and contrast of Velvia, you might want to try the Digital Velvia action set.

Sunday, 4 February 2007

Permission to Crop

Michael Reichmann has recently produced an excellent article on cropping. It has always seemed strange to me that many photographers would not be seen dead using the automatic modes on their cameras yet somehow see it as cheating to break away from the aspect ratio that their camera manufacturer provides.

Cropping is all about finding the shape an image wants/needs to be. As an example lets look at an image I took on Friday at Limehouse Basin in Docklands. Looking at the image as it came off the camera the first thing I did was to use a LAB move to boost the colours and increase the contrast:

20D & 100mm f/2.8 Macro un-cropped image
(Click to view large)

I was trying to convey the feel of the area with the boats surrounded by the very expensive flats, all of which is over shadowed by the giant towers of Canary Wharf. Yet the sheer quantity of things in the image disrupts the message I was aiming for, so I decided on a narrow crop to give the tight vertical feel of a Japanese wall hanging:


final cropped image
(Click to view large)


I still feel its too cluttered and that colour doesn't actually add to the image at all. So the final version ended up as a black & white:


As an image maker it is important to give yourself "permission to crop" and develop a feel for the shape an image should be.

Friday, 2 February 2007

Beginners guide to Photoshop Layers (Part 3) - Changing Exposure

So in the previous episodes we learnt quite a bit about layers, but now we will use them to improve a photograph. In this exercise we are going to look at improving the shadow detail.

In this example I will use a couple of shots I took of The Wibbly/Wobbly bridge which links St.Pauls to Tate Modern in central London. Standing under the bridge in bright sunshine it was obvious that the exposure range from the dark underneath of the bridge to the bright blue sky would be far too much for the camera, so I auto-bracketed my shots +/-2 stops. An alternative to bracketing would be to produce 2 different exposures of the same shot, through the raw converter or duplicate the shot and adjust the brightness/levels to give the effect of two different exposures.

Bracketing took me from having one picture that doesn't look like the scene I saw, to having 2 or 3 that don't! What I need to do is add the light bits from the overexposed shot to the bits of the underexposed shot that have no shadow detail...this is a job for layers....

Open both images and layer them.

Underexposed & overexposed versions of the same shot
(click to view large)

Now click on the darker one with the move tool and drag and drop it on the lighter one - if you hold the shift key down whilst doing the move the 2 layers will centre on top of each other.

You now have the 2 layers in the same image, look at the layers pallet if you don't believe me, so you can close down the image you just dragged from as we no longer need it.

The two images stacked
(click to view large)

Erase through from top to bottom.

Make sure you have the top layer selected and select the eraser tool. Now you can select the darker areas of your image and erase through the top layer to show the brighter layer underneath.

Starting the erase process
(click to view large)

To do this properly you will need to take your time and vary the brush size (use the [ and ] keys on the keyboard). Also its handy to remember the undo key (ctrl+Z) and step backward (alt + ctl + z)can help you here a lot.

Erasing finished
(click to view large)

As you work, switch the layers off and on and you will see how you are cutting a hole through the top layer to reveal the layer underneath.


In this shot I felt the brightness was too much so I added a small levels tweak to make it look more natural.
The finished product (hey give me a break its only a demo)
(click to view large)

Now the bottom of the bridge is revealed in all its glory yet we still have a blue sky...marvellous.


There has to be a better way

If you have tried this technique out you will soon realise that using the eraser tool is destructive. Its a bit of a pain, as if you make a mistake you might have to use undo half a dozen times to get back to where you were. Even worse if you save the file and realise you have erased a bit that you didn't want to you will have to start all over again.

A much better way is to use masks - which we will cover in the next thrilling installment.