If I only understood what it is the Lightroom team have against relative paths, I would be a happy man. They seem to have gone well out of their way to make life really difficult. We have huge amounts of flexibility when naming files. File names can have any number of different bits of exif and xmp data embedded in them, but ask for the subfolder to support a simple ../ comand and it all goes horribly wrong.
Having done battle to get editing to support relative paths. The final place where I need LR to support relative paths is on export. This would seem a simple thing as there on the screen is an option to output to a subdirectory. Naively I figured if I entered the subdirectory as ../WebReady lightroom would happily plonk it in a sibling folder next to my raw files. But it was not to be, the entry goes red and I get told I can't use those characters. Why the blinky flip not? The Adobe relative path police strike again!
But a bit of thinking and a read of Inside Lightroom gave me an idea. So this is how you get round the problem.
First create your export with all the settings you need in it. Select Put in a subfolder and enter the subfolder name without any pathing characters (./ etc)
Now save that as an export preset - in my case I called it Screen Previews 1024x768, You will find that this has created a file in the presets folder with the same name as your export and a .lrtemplate extension
All you need to do now is open the file in a text editor and edit the line marked export_destinationPathSuffix. Simply add the required pathing there and save the file.
Next time you run your export it will happily go to the directory you want. Simples!
Related Posts
Using relative paths in Lightroom part 1
Using relative paths in Lightroom part 2
Tuesday, 29 September 2009
Using Relative Paths in Lightroom part 3
Labels:
annoyances,
Lightroom,
relative paths
Saturday, 26 September 2009
A sunny week in Cornwall
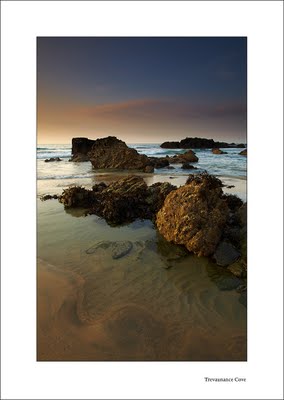
I spent last week down on the golden sands of Cornwall, near Perranporth. Surprisingly for September in the UK the weather was wonderful with lots of clear blue blue skys ideal for strolling on the beach.
Unfortunately clear blue skys don't have very much drama in them and are not really ideal for Landscape Photography (sheesh, there is no pleasing some people is there). I spent a few evenings on the beaches around St.Agnes hoping to get a feel for the beauty of the place.
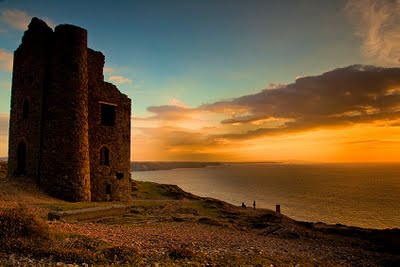
On my penultimate evening I headed out to Wheal Coates, a long defunct tin mine. Where my perseverance was finally rewarded with some clouds and a bit of drama in the sky.
I kind of liked the end result.
Labels:
Cornwall,
Taking Pictures
Friday, 18 September 2009
Using Relative Paths in Lightroom part 2
In part one of these ramblings I noticed that although you could force Lightroom, kicking and screaming, to use relative paths. It's good friend Photoshop was having none of it.
Not to be discouraged I put on my hacking trousers and through together a solution. If there is anyone out there who cares, here is how you fix the problem:
Download This install file and run it in the normal way (press next at all the prompts) - if you don't have the .Net framework 2.0 installed you will need to download & install that too.
Now nip into Lightroom preferences and create a new External Editor.
You need to hit the browse button and chose the program you have just installed (yes I know DaDoRunRun.exe is a rubbish name bt it was the best I could come up with at the time.
Now when you chose to use this External Editor this dialog box will appear:
Just click Edit and a new dialog pops up.
Click on the browse button (...) and point the program to the right path for Photoshop on your machine. Now click OK and all being well Photoshop will open with the correct file.
This is a bit intrusive so next time you call the editor click on the "don't show me this dialog" button and the box will never appear again.
That's it problem solved! Well except that Lightroom won't stack files in different directories. Now that is a weird limitation, I thought the whole point of Lightroom was that directories weren't that important any more - looks like I'm wrong on that one.
I bet no one ever uses this information but, I still feel I should make it available - as a public service. Of course I am happy for someone to post a comment telling me why relative folders are such an evil concept that they should be banished...
Related Posts
Using relative paths in Lightroom part 1
Tuesday, 15 September 2009
Using Relative paths in Lightroom
A while back I mentioned that I found Lightroom to be a bit "claustrophobic". I hadn't been using the system long when I came across an example of this: I noticed, that when I selected Edit in Photoshop that Lightroom first creates a psd file in the same directory as the raw file then opens this file in Photoshop. This is all well and good but personally I would like to use Tiff format and not have the files in the same directory (I know I'm a control freak).
So I wandered off to the preferences section and there I seem to be able to change the file format (which is great), but not the folder the file is created in (which isn't). So I take a look in the Export options, there I can enter a subfolder but it won't let me enter a relative path it has to be a sub folder….arrgh!
For those that don't know what I am on about a relative path is something like this ../tiffs the two dots mean "up one level" and the slash means go to a sub folder. So in this case we are asking to go to a tiffs folder that has the same parent as our current folder.
Another annoyance is why have different setups for editors and exports? As far as i can see editors are really only a specific type of export, so why configure them in 2 different places?
Most sane people would by now have just let the generated files go into a subfolder and have done with it, but I have been doing things this way for 3 or 4 years now & I don't see why I should change just because someone at Adobe can't be bothered to support relative paths.
So I decided to see if there was a way round the problem and eventually I think I have it sorted.
First go into preferences and click on the external editing tab. Down in the additional external editor section you need to setup the program you want to use and the file format. From the dropdown menu at the top you can then select save current settings as a new preset and name your settings.
Now we need to add a new filename template. Click on the dropdown for filename and create a new preset. This is where you can add a relative path.
Now when I call up an external editor it works just how I want it to…..
…well except Photoshop CS2 - someone at Adobe really hates relative paths. Photoshop doesn’t seem to open the paths with relative addressing in them. Most other applications seem to understand that
C:\Working\2009\08\01\Raw\..\Tiffs\CS20090801-17738.tif
really means
C:\Working\2009\08\01\Tiffs\CS20090801-17738.tif
But Photoshop doesn’t! In part two I'll be detailing my little fix that gets round this problem.
Labels:
annoyances,
Lightroom,
Photoshop,
relative paths
Thursday, 10 September 2009
Inside Lightroom 2 - A Book Review
I've just finished reading Inside Lightroom 2: The serious photographer's guide to Lightroom efficiency: The Serious Photographer's Guide to Lightroom Efficiency by Richard Eamey
Its an interesting book that attempts to go further than the simple "how-to" books.
Chapter 1 starts with details of what Lightroom is, and a basic an overview of its functionality and features. It doesn't add too much to your life, but it sets the context for the rest of the book.
Next he goes onto "the ideal system" for Lightroom 2 well, it covers most of what you need to know but it is a relatively shallow description of what you should be looking at. A serious photographer would be better off looking at the The DAM Book as it covers this in much more depth.
Then we get a description of the differences between version 1 of Lightroom and version 2. Although this well written and added to my knowledge on the subject it had the feel of being a bit of padding.
Chapter 4 takes you through how to manage your photos and there is quite a bit of useful information here. This is followed by an example workflow, which is a great way to see how the product is actually used. Though it would be great to see a few more workflows detailed here for different types of photographers: journalists & wedding photographers leap to mind.
After that it is on presets. Clearly this is an area that Richard knows a lot about and explains in great detail. It really shows how presets work, and it even shows you how to edit them in a text editor, which is rather wizzy. This allows you to duplicate some of the tone curve functionality from Adobe Camera Raw. All clever stuff and well worth reading once you really understand Lightroom.
The final chapter details online resources for Lightroom, which is surprisingly useful due to the use of tinyurls and a grouped rss feed that makes it easy to get to grips with what is out there.
At the end of the book, I was left with a feeling that it is excellent in parts and somewhat disappointing in others. Personally I would like to see the workflow and presets sections used as part of a different book "Extending Lightroom 2". This would cover those two subjects as well as, the use of the various plug-ins available, real world issues like how to integrate web galleries into your existing site and a guide to writing your own plug-ins. Now that would be well worth buying.
Pros
Clear layout
Detailed knowledge of Presets
An easy quick read
Cons
Too much padding
More examples needed
Monday, 7 September 2009
Export iView/Expressions Media Category Sets to Lightroom Hierachical Keywords
As part of my adventures of moving to a Lightroom world, I've started to look at Keywording. Now the Lightroom Hierachical keywords, seem like a really good thing and although I can easily build up a big set of keywords thanks to The Controlled Vocabulary what I really want is to pull in the hierachy of Catalog Sets I spent ages creating in iView.
As far as I can see the only real way to get this list would be to recreate this in Lightroom manually. As I didn't fancy all that typing I came up with This Script (which is heavily based on John Beardsworths script I used previously)
To use it all you need to do is change one or two lines in the file:
Change this to the name of the catalog set you wish to export:
If you should wish to change the name or location of the file of hierachical keywords you create then this is the line to change.
Once you have edited the file, save it in your iview scripts folder. The Open iview with the catalog containing the sets you wish to export. Run the script from the script folder and after a few seconds you should get a "Done" message.
Open lightroom and select the Library module. Select Metadata>Import Keywords and brows to the file you have created C:\iViewCategories.txt and your Keywords should apear as if by magic:
As far as I can see the only real way to get this list would be to recreate this in Lightroom manually. As I didn't fancy all that typing I came up with This Script (which is heavily based on John Beardsworths script I used previously)
To use it all you need to do is change one or two lines in the file:
Change this to the name of the catalog set you wish to export:
Const ivKeywordSetName = "Places"
If you should wish to change the name or location of the file of hierachical keywords you create then this is the line to change.
const filePath = "C:\iViewCategories.txt"
Once you have edited the file, save it in your iview scripts folder. The Open iview with the catalog containing the sets you wish to export. Run the script from the script folder and after a few seconds you should get a "Done" message.
Open lightroom and select the Library module. Select Metadata>Import Keywords and brows to the file you have created C:\iViewCategories.txt and your Keywords should apear as if by magic:
Labels:
iView Media Pro,
Keywording,
Keywords,
Lightroom,
Workflow
Thursday, 3 September 2009
It's the start of the season!
Now that autumn is approaching and the days are getting shorter the dawn photography season is now open. Yes Sunday, marked for me, the start of the period when getting up to shoot the dawn is actually possible.
Dawn is now just after 6:00am, which means that I can now get up at the "reasonable" time of 4:00am! It's strange to inhabit a bizzaro world where 4 in the morning doesn’t seem too bad a time to get up – but such is the life of a landscape photographer.
Why get up 2 hours before? Well I need to be on site half an hour before dawn at least. Most of my locations are an hours drive away, so that leaves me just half an hour to get out the house of which 10 minutes are spent trying to convince my boy dog that he can't come with me! Interestingly enough, neither my wife or our girl dog show the slightest interest in coming with me, now I'm not saying that females are naturally lazy creatures…but the evidence does suggest that.
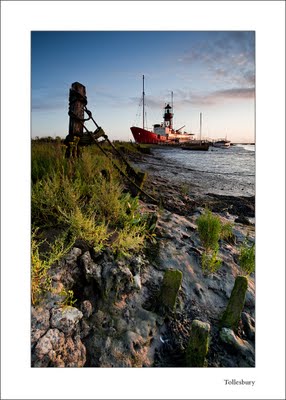
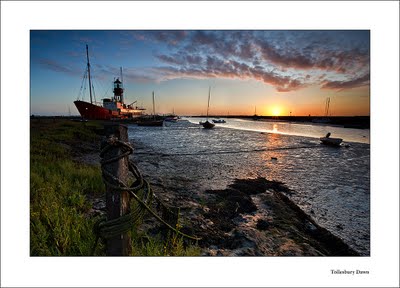
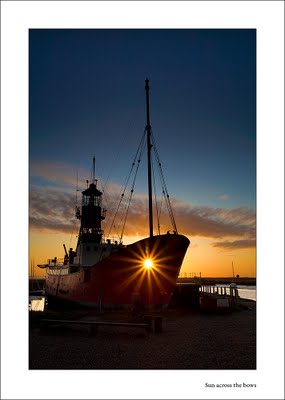
Having gone to this trouble I thought I would show you the results of my expedition to Tollesbury on the Essex coast. It was a fine morning and having taken these shots, I was back home for breakfast at 8:00. All in all, worth getting up for.
Labels:
Photographic Locations,
Taking Pictures
Tuesday, 1 September 2009
Andreas Stridsberg is photographer of the month for September
Andreas Stridsberg is our photographer of the month for September. Andreas is a Swedish photographer who produces work in a whole range of different styles. His work covers Landscapes, people, nature and a whole lot more.
Treat yourself to a visit to his site...you won't regret it.
Previous Photographers of the Month
Treat yourself to a visit to his site...you won't regret it.
Previous Photographers of the Month
Labels:
Photographer of the Month,
Photographers
Subscribe to:
Posts (Atom)